5 Steps to Booking the Best Place to Stay | Travel Prep Series
 {This is a repost from my blog archives. I wrote this in 2016 – most all of the tips here are consistent with how we book hotels today, even though our life is very different.}
Welcome to the third part of my Travel Prep Series! As mentioned in my previous travel prep posts, after traveling often over the past few years, I feel like I now have a solid strategy in place for planning a trip, and I’m excited to share that with you! None of these tips are life-changing. They are just the simple steps I take to prepare for a trip before our departure date. So far, using these steps, we have managed to see many parts of the world on the many (mostly) seamless trips we have taken over the past five years.
For part three of this series, I’m sharing the details of my accommodation booking process. Using these steps, I’m usually able to find us great accommodation options for our trips at either a traditional hotel or Airbnb.
To explain the process, I’m going to use a trip I recently booked as an example. I booked an Airbnb in Boston for a trip I’m taking with my sister at the end of September. {2019 Update: I shared a little about this trip here.}
(I link to several tools in this post; however, this is just for your convenience. I do not get compensated in any way by these companies.)
1. Check Hotels.com for hotel options.
If I’m not booking a hotel with points, I always start my search at Hotels.com. In my experience, they show the lowest price options on hotels, and they have an excellent rewards program where, after booking ten nights, you get a free night worth the average value of your ten nights you booked. Be sure you have a Hotels.com account before you book!
Put in your destination and trip dates in the search area. Once your results come up, filter for your preferences including price, distance to landmarks, guest ratings, public transportation, neighborhoods, etc. Be sure you select “all filters” so that you can see all of your search options. Below is a screenshot of what I put in for my Boston trip with my sister.
 This is also a good time to get an idea of what you want to do and what areas you want to spend the most time in. Obviously the closer you are to major landmarks and attractions, the more expensive your options will be, but it can’t hurt to see what your options are in your “perfect” location. Also, keep in mind that even if you save money on your lodging costs by staying further away from popular areas, you might not end up saving as much money as you expect due to extra costs (e.g. higher travel costs), and it could be more inconvenient than it’s worth.
Play around with different options and preferences until you’ve come up with a list of your top three or four options for hotels.
We couldn’t find any Boston hotel within our price range that was close enough to the city center to make a short trip worth it, so I skipped on to step 3. If you found some good hotel options, move on to step 2.
2. Look at the TripAdvisor reviews for your top few choices.
Once you’ve gone through and selected a few top options that fit within your preferences (if any), go to TripAdvisor to note rankings and read reviews. The Hotels.com guest reviews are good to reference as well, but I like to see how my choices compare on the TripAdvisor rankings. I usually look at both.
At this point, you should have your top one or two hotel options selected, so write them down before moving on to your next step.
3. Go to Airbnb.com to see your home and apartment rental options.
Open up a new tab in your browser and go to Airbnb.com (another good option is HomeAway). Type in your city, dates, and number of guests as well as your price range and room type (entire home, private room, or shared room).
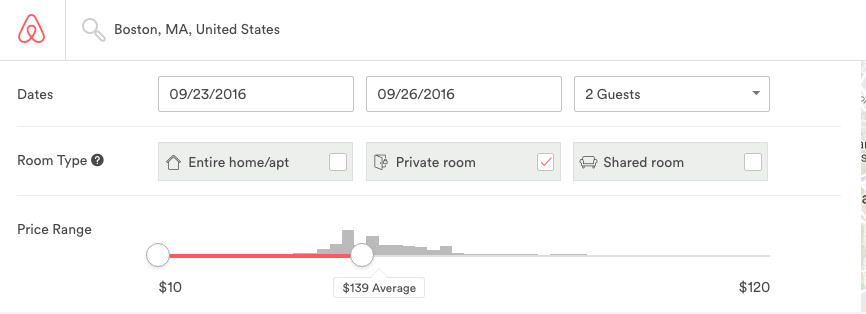
Go through your list of options. I usually open up a few of the listings with the most number of highly-rated reviews. For example, I’d be more inclined to open up a listing with three hundred 4.5 star reviews rather than one with twenty 5 star reviews. I also like to read through the most recent guest reviews for any listing that catches my eye.
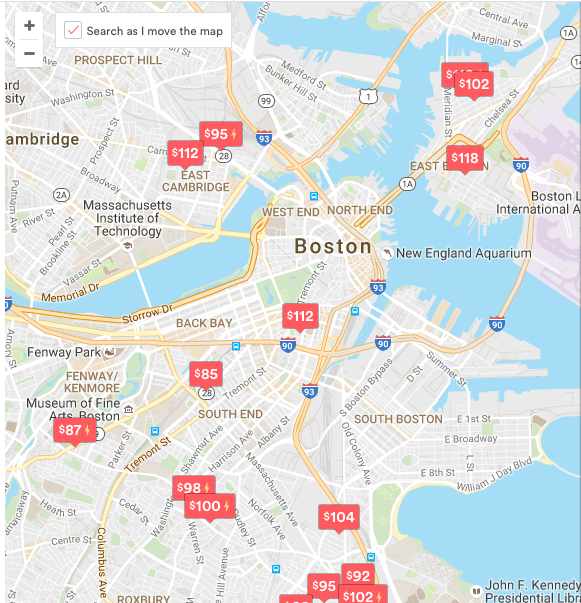
It’s also fun and informative to play around with the map view (with the “search as I move the map” option selected).
As a side note, Airbnb has become very popular over the past several years. My husband and I have used Airbnb quite a bit, especially during our three month backpacking trip in Europe. In addition to the cost savings there are other advantages to using Airbnb, including conveniences like kitchen and laundry facilities, the privacy of a whole home or apartment, and the ability to stay in fun neighborhoods which might not have hotels at all. However, there can be downsides too, such as coordinating key pick-up with the owners, lack of airport transportation, and often having no place to store luggage before check-in or after check-out. One day I’ll write a post that shares more detail on my thoughts on staying in a hotel versus Airbnb, but I wanted to toss out a few thoughts here.
Back to booking your place to stay! After looking at the details of several listings and coming up with a good list, you are ready to move on to step 4.
4. Open Google maps to compare locations for your top hotel and Airbnb options.
Now open up Google maps and start searching for your top hotel and Airbnb options on a map. Compare the locations. Which options are closer to your “perfect” area of the city? If I’m staying in a big city, I also usually look for distance to public transportation and walkability at this stage.
5. Select your lodging combination and book!
You may get better deals if you are willing to switch accommodations in the middle of your trip. For example, you may find a great hotel deal for Wednesday through Thursday, but that particular hotel significantly increases their rate for the weekend – this is a good time to look at the Airbnb options for just that weekend alone. As another benefit, you get the chance to explore and get a better feel for more than one area of a city if you stay in more than one place.
Once you’ve made your selections, book your hotel and/or Airbnb! For hotels, keep in mind that if you are collecting points for a certain hotel brand, book through that hotel’s website. Otherwise, book on Hotels.com and start collecting free nights through their reward program.
I ended up booking this Airbnb rental for my sister and me because of its good reviews, proximity to public transportation, and affordable price. Since we will really only be at the Airbnb to sleep at night, it wasn’t top priority for us to have the whole house to ourselves (as long as the rental seemed safe and well-reviewed, and this one does).
 Now that you’ve got your flight and your lodging booked, it’s time for the fun part: planning the itinerary! In my next post I’ll share how I come up with what to do and where to eat and drink (while still leaving room for wandering and getting lost, of course!).
That’s my five-step process for finding the best place to stay. Share below if you have any additional tips!
To see the other posts in my Travel Prep Series, click here!
{Thanks for reading! Want to know a little more about me? I’m a CPA learning how to balance a career with motherhood and regular travel while planting roots at home in the Austin, TX area. When I’m not exploring my home city with my husband Daniel and baby boy Carson or cuddling with my chubby orange cat Banana, I’m probably either out on a playdate with my son or planning, packing for, traveling to, or daydreaming about our next adventure. After all, my travel mug collection is never complete. If you have wanderlust too, be sure to follow me on Instagram (and InstaStories!), Pinterest, and Facebook, or subscribe to my blog!}
